What is a Homemade Whitening Scrub?
A homemade whitening scrub is a gentle yet effective skincare treatment designed to exfoliate the skin, remove dead skin cells, and promote a brighter, more even complexion. Unlike harsh chemical treatments, these scrubs harness the power of natural ingredients found in your kitchen, making them a cost-effective and often safer alternative for achieving a radiant face. The primary goal is to lighten hyperpigmentation, reduce the appearance of dark spots, and unveil the fresh, glowing skin underneath. This is achieved through a combination of physical exfoliation, which sloughs off dead skin, and the brightening properties of certain ingredients.
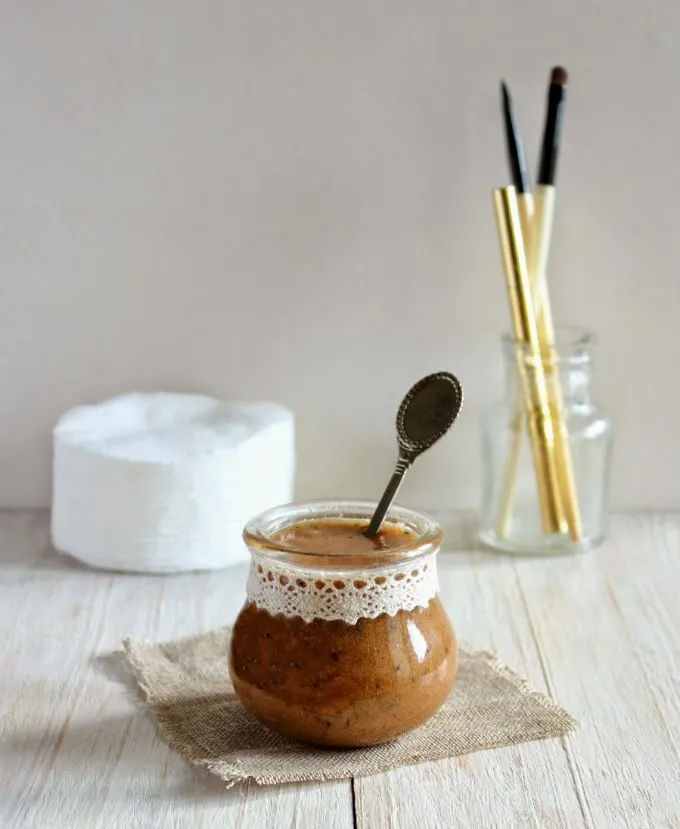
Ingredients You Need for a Homemade Whitening Scrub
Creating your own whitening scrub allows you to tailor the ingredients to your specific skin type and concerns. The foundation of a good scrub typically includes a base ingredient for exfoliation, a liquid component to bind the ingredients, and optional additions for added benefits like hydration or brightening. The beauty of a homemade scrub lies in its simplicity – you likely already have many of the necessary ingredients in your pantry. Understanding the properties of each ingredient is key to maximizing the effectiveness of your scrub and achieving the desired results. Avoid ingredients that may cause allergic reactions, if you have sensitive skin. Always perform a patch test before applying it to your face.
Essential Ingredients

Essential ingredients form the core of any effective whitening scrub. They are the workhorses that provide exfoliation and contribute to the overall brightening effect. Sugar or salt acts as the primary exfoliating agent, gently removing dead skin cells. Honey or yogurt are often used to bind ingredients together and provide moisturizing benefits. Honey is known for its antibacterial and soothing properties, while yogurt contains lactic acid, a mild exfoliant. Using these ingredients in your whitening scrub can create the best effect for you and your skin.
Optional Ingredients
Optional ingredients allow you to customize your scrub for specific skin concerns. Lemon juice, known for its natural bleaching properties, can help lighten dark spots and even out skin tone, but should be used cautiously due to its acidity. Turmeric, a powerful antioxidant, adds anti-inflammatory benefits and a subtle brightening effect. Essential oils, such as tea tree or lavender, can be included for their aromatherapy benefits and skin-soothing properties; however, they should always be diluted in a carrier oil before use. When creating your own scrub be sure to test out the ingredients before putting on your face.
Step-by-Step Guide to Making a Homemade Whitening Scrub
Creating a homemade whitening scrub is a straightforward process that can be easily adapted to your preferences. The key is to follow a few simple steps to ensure the scrub is effective and safe for your skin. From gathering the right ingredients to applying and rinsing, each step plays a crucial role in the overall outcome. Taking your time and paying attention to the proportions and consistency of the mixture will help you create a scrub that delivers noticeable results and leaves your skin feeling refreshed and revitalized. Following these steps will ensure a proper result in the end.
Step 1 Preparing the Ingredients

Before you begin mixing, ensure all your ingredients are readily available and measured out. This helps streamline the process and ensures accuracy. For example, if you are using granulated sugar as your base, make sure you have the correct amount measured. If using essential oils, have your carrier oil ready for dilution. It’s also a good idea to have a small bowl and a spoon or spatula for mixing. Proper preparation ensures a smooth and efficient scrub-making experience, allowing you to focus on creating the perfect blend for your skin.
Step 2 Mixing the Scrub
In your mixing bowl, combine the exfoliating base (sugar or salt) with the liquid binder (honey or yogurt). Mix well to ensure the ingredients are evenly distributed. Gradually add any optional ingredients, such as lemon juice or turmeric, and mix until you achieve the desired consistency. The scrub should be thick enough to adhere to your skin but not so thick that it is difficult to apply. If the scrub is too dry, add a bit more liquid binder; if it is too runny, add more of your exfoliating base. Adjusting the consistency is crucial for a comfortable and effective application.
Step 3 Applying the Scrub
Apply the scrub to your clean, damp face, using gentle circular motions. Avoid the delicate eye area. This massaging action helps to exfoliate the skin, stimulating circulation and promoting cell turnover. Massage the scrub for 1-2 minutes, paying extra attention to areas prone to dark spots or uneven skin tone. Be careful not to scrub too vigorously, as this can irritate the skin. Always use light pressure, allowing the exfoliating particles to do their work. Be sure to wash your hands before applying the scrub on your face and body.
Step 4 Rinsing and Moisturizing

Rinse your face thoroughly with lukewarm water to remove all traces of the scrub. Gently pat your skin dry with a soft towel. Follow up with a light, hydrating moisturizer to lock in moisture and soothe the skin. Moisturizing after exfoliation is essential to prevent dryness and irritation. Choose a moisturizer that suits your skin type and provides the necessary hydration without clogging pores. Consistent moisturizing enhances the effects of the scrub, leaving your skin feeling soft, supple, and radiant. Be sure to test the moisturizer out on your body or a small area before putting it on your face.
Benefits of Using a Homemade Whitening Scrub
Homemade whitening scrubs offer a multitude of benefits, making them a popular choice for those seeking a natural approach to skincare. From improving skin texture to reducing the appearance of dark spots, these scrubs provide a gentle yet effective way to enhance your complexion. The ability to customize the ingredients and control the quality of the products further adds to their appeal. By incorporating these scrubs into your skincare routine, you can experience significant improvements in skin tone, radiance, and overall health. Creating your own whitening scrub gives you all the benefits you need at home.
Exfoliation and Dead Skin Removal
The primary benefit of a whitening scrub is its ability to exfoliate the skin, removing dead skin cells that can make your complexion appear dull and uneven. Exfoliation encourages cell turnover, revealing fresh, new skin cells underneath. This process helps to unclog pores, reduce the appearance of blackheads, and improve the overall texture of the skin. By regularly exfoliating with a homemade scrub, you can achieve a smoother, brighter, and more radiant complexion. Removing the dead skin cells on your face is very important.
Skin Brightening and Tone Improvement

Many ingredients used in whitening scrubs, such as lemon juice and turmeric, contain properties that can help brighten the skin and even out skin tone. These ingredients work to lighten dark spots, reduce hyperpigmentation, and promote a more uniform complexion. Regular use of a whitening scrub can lead to a noticeable improvement in skin tone, giving you a more youthful and glowing appearance. The combination of exfoliation and brightening ingredients makes these scrubs an effective solution for achieving a radiant face.
Reducing the Appearance of Dark Spots
Homemade whitening scrubs can be particularly effective in reducing the appearance of dark spots and hyperpigmentation caused by sun damage, acne scars, or other factors. The exfoliating action helps to slough off the surface layers of skin, while ingredients like lemon juice and turmeric work to lighten the darker areas. Consistent use of a whitening scrub can gradually fade dark spots, leading to a more even and radiant skin tone. Be patient, as it takes time to see results, but with regular use, you can achieve a noticeable improvement in your complexion.
Safety Tips and Precautions
While homemade whitening scrubs can be beneficial, it is essential to take certain precautions to ensure your skin’s safety and prevent irritation. Understanding your skin type, choosing the right ingredients, and using the scrub correctly are all critical for a positive experience. Always prioritize the health of your skin, and be mindful of potential sensitivities. Always make sure you read all the ingredients before putting them on your face to prevent skin irritation. There are also steps you should take before applying the scrub to your face.
Choosing the Right Ingredients for Your Skin Type

The ingredients you choose should be compatible with your skin type. If you have sensitive skin, opt for gentle exfoliants like finely ground sugar and avoid harsh ingredients like lemon juice or strong essential oils. For oily or acne-prone skin, consider using ingredients like tea tree oil, known for its antibacterial properties, and clay, which can help absorb excess oil. If you have dry skin, incorporate hydrating ingredients like honey or yogurt to prevent dryness. Tailoring your scrub to your skin type is crucial for maximizing its benefits and minimizing the risk of irritation. Always test out the ingredients on a small spot before using them on your entire face.
Patch Testing Before Application
Before applying a new whitening scrub to your entire face, it’s essential to perform a patch test. Apply a small amount of the scrub to a discreet area of skin, such as your inner arm or behind your ear. Wait for 24-48 hours to check for any signs of irritation, redness, or allergic reaction. If you experience any adverse effects, discontinue use immediately. A patch test helps to identify any potential sensitivities to the ingredients in your scrub, ensuring a safer and more enjoyable experience. This step is vital when using new ingredients, especially those with known potential for irritation.
Frequency of Use
The frequency of use depends on your skin type and the sensitivity of your skin. Generally, it is recommended to use a whitening scrub 1-2 times per week. Over-exfoliating can lead to dryness, irritation, and even breakouts. If you have sensitive skin, you may want to start with once a week or even less. Pay attention to your skin’s response and adjust the frequency accordingly. If your skin feels dry or irritated, reduce the frequency. Proper exfoliation will create the best results for you.
Other Natural Skincare Tips for a Radiant Face

In addition to using a homemade whitening scrub, incorporating other natural skincare practices can further enhance your complexion. These tips will provide additional benefits that will make your face radiant. Maintaining a healthy lifestyle, including a balanced diet, adequate hydration, and sufficient sleep, is essential for overall skin health. Also protecting your skin from sun exposure is crucial to prevent damage and maintain an even skin tone. By combining these practices with a regular skincare routine, you can achieve and maintain a naturally radiant face. Your face will thank you for your care and effort.
In conclusion, a homemade whitening scrub offers a simple, effective, and customizable way to achieve a radiant face. By following the guidelines for ingredient selection, preparation, and application, you can create a scrub that meets your specific skincare needs. Remember to prioritize safety, and be patient as you incorporate this natural treatment into your routine. Consistent use, along with other healthy skincare practices, will help you reveal your best, most glowing complexion. With a little effort and the right ingredients, you can unlock the secret to a naturally radiant face.